Total Pageviews

Showing posts with label build muscle. Show all posts

Wednesday, 6 August 2014

WHAT SELF DEFENCE STYLE SHOULD I PRACTISE?

There are a few things to consider before choosing the martial arts style that's best for you.
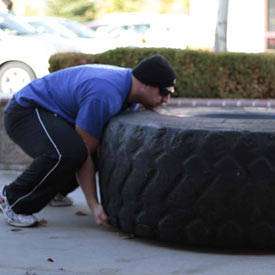
Are you only interested in getting a good workout or in better shape before stepping foot in a martial arts studio? If so, then a cardio-kickboxing class might be the right choice for you. Cardio-kickboxing is a great way to introduce yourself to martial arts, and there's probably a class offered at your local gym. You won't learn intricate techniques, but you will build up the musculature and stamina needed for a lot of martial arts.  Getting in better shape and feeling stronger will definitely give you a huge boost if you decide to try a traditional form of martial arts.
You shouldn't worry about getting hurt (besides the occasional bump or bruise), but you still need to consider your comfort level when it comes to getting ‘up close and personal’ with someone you don't know. If you're ready to dive right into some hardcore fighting, then you might want to try Brazilian Jiu Jitsu, Muay Thai kickboxing, or Krav Maga. If you want to learn a martial art at a less aggressive pace, then Tae Kwon Do, Karate, or Wing Chun Kung Fu might be more to your liking.

Brazilian Jiu Jitsu is a streamlined form of grappling designed for maximum impact that includes choke holds and limb locks. It's very intense and not for the faint of heart, but if you're looking for self-defense, it can't be beat. There are belts in Brazilian Jiu Jitsu, but you won't be learning forms or katas to advance. Advancement in Brazilian Jiu Jitsu depends on how well you spar, which means you’ll have to prove your ability on the mat.
Muay Thai kickboxing will literally kick your butt, and it's one of the best standing fighting styles out there. And like Brazilian Jiu Jitsu, you'll only advance by actually fighting in the ring. There are a lot of schools offering "mock" Muay Thai that's really just a blend of other fighting styles, so make sure the school you choose has certified Muay Thai instructors.

Krav Maga is the official self-defense system of the Israeli Defense Forces, and it's specifically designed to teach you effective and practical hand-to-hand combat techniques. It's an amazing workout, and most schools have great programs for women.

You'll do a whole lot of kicking in Tae Kwon Do, but you'll also have to learn about the spiritual side of the martial art. Tae Kwon Do is very popular, so you probably won’t have any problem finding a program in your area.

Karate is the term most associated with martial arts, but there are a variety of styles of Karate to choose from. Karate styles are based on striking with both hands and feet, and you can find styles that emphasize either the more philosophical or combative aspects of the art.

Wing Chun Kung Fu is a martial art that emphasizes close-range striking and combat techniques, and legend tells that it was developed by a woman. Bruce Lee originally trained in Wing Chun, and if you've ever seen a martial arts film where the star is practicing on a wooden dummy that has sticks jutting out, he was probably practicing Wing Chun.

Capoeira is fantastic way of building self defence skills, whilst gaining cardiovascular fitness and advanced muscle development. As a street based martial art, it emphasizes close quarters sparring and creative offensive and defensive techniques.

In order to advance in Tae Kwon Do, Karate, or Wing Chun, you'll have to learn forms or katas, which are a specific series of complex movements. If the idea of have to actually fight to advance doesn't appeal to you, then you might want to one of those three styles.

Everyone is a beginner at some point, so you shouldn't be nervous if you've never punched or kicked anything before. At the end of the day, a martial arts studio is a business that needs new clientele in order to thrive, and women mean big business. Most studios will offer free or low-cost introductory lessons, programs for beginners, and programs designed specifically for women, so do a little research beforehand and find a studio that has a variety of options that suit your needs

Tuesday, 5 August 2014

A CRAZY WORKOUT FOR A POWERFUL BACK


The back is one of the largest muscle groups in the body, composed of
 
.Sternum Chin-Ups
This variation of the chin-up involves leaning back throughout the entire movement. In this variation, the lower portion of the chest should touch the bar. As you pull yourself to the bar, have your head lean back as far away from the bar as possible and arch your spine throughout the movement.  Your hips and legs will be at about a 45-degree angle to the floor. You should keep pulling until your collarbone passes the bar and your sternum touches it.
 
 
Seated Rope Cable Rows to Neck
Most people will agree that the vast majority of trainees devote far more time to chest work than to back work. As a result, they start to look like Neanderthals. Seated cable rows to the neck will help balance the equation.
 
Set the adjustable pulley so that it’s directly in front of your pecs. Use a rope—it will reduce the stress on your forearms and wrists and allow you to concentrate on the task at hand (which is upper back work, just in case you forgot).
 
Grab the ends of the rope with a pronated grip. Start with the shoulders protracted and the forearms extended. Begin the movement by retracting the shoulder blades, and immediately bend the elbows to continue the movement until the forearms make contact with the upper arms.
 
Make sure to eliminate the lower back from the equation by keeping it perpendicular to the floor at all times. If the development of your rhomboids is lacking, you may choose to pause for a moment when the shoulder blades are retracted.
 
Narrow Parallel- Grip Chin-Ups
 
Many gyms are equipped with V-handle chin-up stations that are set six to eight inches apart, and this is just about perfect. Focus on bringing your lower sternum to the handles as you pull yourself up. In other words, lean back as you near the top of the concentric range.
 
Since the grip is narrow, the inferior fibers of the latissimus are hugely recruited. These fibers have been shown to have a higher fast-twitch makeup than the superior fibers and, therefore, they should be trained using lower reps.


Tuesday, 29 July 2014

LOSE THOSE FLABBY ARMS 2!!!

Chair Dips: dips are another common exercise that help develop the triceps, while also working the pectorals and major shoulder muscles. All you need to perform this exercise is an exercise bench or step, though a kitchen chair will also work just fine.
To perform a basic bench dip:
  1. Sit up straight on the edge of the bench or chair, extending your legs in front of you and planting you feet firmly on the ground.
  2. Firmly grip the edge of the bench or chair, with your fingers facing downwards. Slowly slide your body off the bench, without moving your legs.
  3. Slowly lower your body towards the floor, keeping your back straight, until your arms from a 90 degree angle.
  4. Push your body back to the original starting position. You have now completed one repetition.
Variations: To increase the difficulty of the bench dip, try propping your feet up on a second exercise bench or chair.
Old school arm circles. Arm circles are a great, easy exercise that can be performed anytime, anywhere, making them a great exercise option for beginners. Arm circles help to tone both your biceps and triceps, while also strengthening the back and shoulders.
To do arm circles:
  1. Stand with your feet about a shoulder width apart and extend your arms straight out to the sides, so they’re in line with your shoulders.
  2. Begin rotating your arms forward in small, circular motions, without moving your wrists or elbows.
  3. After about 20 circles, change direction and begin rotating your arms backwards.
Variations: To increase the intensity of the arm circles, you can rotate your arms faster or use hand weights that are light enough to allow you to do 8-10 rotations.
Targeted bicep curls. Bicep curls are one of the most basic weight lifting exercises, which help you to build arm strength and look good in short sleeves. Bicep curls target the three bicep muscles which control the flexing of your elbow.

To do bicep curls, you will need a set of dumbbell that weigh between 5 and 15 pounds each.
  1. Hold a dumbbell in each hand and stand up straight with your feet hip width apart.
  2. Let your arms hang relaxed at your sides, with your palms facing forward.
  3. With your elbows held at your hip bones, slowly raise both weights until your forearms touch your chest.
  4. Slowly lower the weights back into the starting position, maintaining tension in your biceps. Make an effort to maintain good posture at all times, with your back straight and stomach pulled in.
Variations: If you are performing this exercise at your local gym, look for an arm-curl machine which will target the exact same muscles as the dumbbells. If you’re doing the exercises at home for the first time, you can also use a standard 15 oz can of beans or peas to perform this exercise.

Thursday, 24 July 2014

DISCOVERING YOUR FITNESS POTENTIAL


The goal of fitness is getting yourself to your maximum physical potential. Consequently, you should be focused on pushing the limits of how far your body can go in terms of fitness. Unfortunately, lots of people focus more on the aesthetic part of fitness as opposed to the performance aspect. This leads to erroneous beliefs such as spot toning, and exercises which focus on a particular body part to the exclusion of others.
 
By working out every single part of the body, you will remain athletic and be able to put your muscles to good use. You will also look much better and not seem out of proportion.


Wednesday, 23 July 2014

HOW TO STRIP FAT AND GAIN MUSCLE

 
A common misconception is that you can hit the gym, pile up the weight and create the body you want. You'll need to combine healthy eating with fat-burning aerobic exercise and muscle-building strength training to get solid, lasting results.

 
Here are steps to Stripping that unwanted fat and revealing the smooth, hard muscle mass underneath.


  • Ditch liquid calories that come from soda, alcohol, specialty coffees, energy drinks and sugary juices. Replace with water and fresh fruit juices.
  •  
  • Eat nutrient dense foods which are high in vitamins, minerals and antioxidants without the added fat, calories and sugar. These food sources are plentiful in Nigeria and include corn, beef, leafy vegetables and tubers.
  •  
  • Eat a lot of protein,
  •  
  • Build muscle with strength-training two to four times a week. You can focus on two or three muscle groups per day or alternate between upper body and lower body workouts. Let your muscles rest for at least 48 hours before training the same muscle group to avoid injury.
  •  
  • Use weights that challenge your body for muscle growth. You should be using a weight with which you can complete at least six repetitions but no more than 12. If you are not able to tire out your muscles within 90 seconds, increase the amount of weight you are using.
  •  
  • Perform at least 150 minutes of cardio exercise each week. Split this time up over several days a week. You can work at a moderate pace for longer periods of time.

Friday, 18 July 2014

BODY SCULPTURES

These individuals have sculpted muscle into works of art, building strength and athleticism at the same time.
 
Moorea Wolfe

wolfe

This fantastic looking girl from Arizona has been training and competing in bodybuilding since the early 2000’s, having started at age 19. She started out dancing and competing in gymnastics before she moved on to fitness competitions. On top of her competitive career she has also worked as a personal trainer.
 
jane
 
Born and raised in Nairobi Kenya, Jane Mukami is probably the sexiest female body builder in Kenya. Currently residing in Atlanta, Jane also known as ’fitkenyangirl’ could be pass for a model with her sexy and trim shape.
 
Charlize Theron


Saturday, 5 July 2014

OCCLUSION TRAINING

 Some of the top trainers in bodybuilding are currently employing occlusion training or blood flow restriction training, as it is also called. It's a technique in which the upper arm or upper leg is wrapped with a compression sleeve, knee wrap, or wrist wrap, to the point where the veins are mildly compressed, but not so tightly that the arteries are restricted.
Occlusion Training: Get Bigger Lifting Lighter
 
According to Dr. Layne Newton, Blood Flow Restriction training when performed properly allows one to use much lower weights than normal training protocols and still achieve sizable anabolic training responses. If you can find the perfect line between "tight" and "too tight," you create a state in the muscle where the blood can get into the muscle through the arteries, but has trouble exiting the muscle through the veins. Metabolic by-product accumulation is primary mechanism by which occlusion training produces hypertrophy. These metabolic by-products would normally be ‘washed out’ by normal blood flow, but occlusion allows them to accumulate near the muscle.  In other words, occlusion training drives more total blood into the muscle. Dr. Jacob Wilson cited three major reasons why this is beneficial.
 
Occlusion training engorges muscle cells with so much fluid that the muscle cells are forced to stretch and expand. You may think you've experienced "skin-tearing" muscle pumps during blood-gorging sets, but this technique could make you rethink what a pump can be.
 
The accumulation of blood in the muscle lowers the cellular oxygen levels and makes your muscles feel weaker. In response, your body recruits the larger fast-twitch muscle fibers, which are more receptive to growth.
 
Finally, when oxygen is low, lactic acid rapidly accumulates in the muscle. This may sound bad—and I'll be honest, it doesn't feel great—but some recent studies have shown that lactic acid by itself can increase protein synthesis and spur muscle growth.
 
BFR training is very difficult even though the loads are very light. It is easily the most painful form of training I have ever performed. As always, before starting any kind of new training protocol, you should talk with a medical professional. BFR can be performed for the thighs, calves, upper arms, and forearms using a blood pressure cuff or tightly wrapped knee wraps (more practical). To occlude the thighs and upper arms, wrap at approximately 70% of maximum tightness around the uppermost part of the muscles. To occlude the calves or forearms wrap at approximately 70% of maximum tightness just below the knee or elbow.
 
Perform 3-5 sets to muscular failure with 20-50% of your 1 rep max on a given exercise with the muscle occluded the entire time. Rest periods should be 30-60 seconds between sets. After the final set remove the wraps and restore blood flow to the muscle. A word of advice, be prepared for a lot of pain and if you do not find yourself in excruciating pain, the odds are the wraps are not tight enough. Try blood flow restriction training and take your training to another hypertrophic dimension


Friday, 4 July 2014

3 TECHNIQUES TO TURBO CHARGE YOUR MUSCLE GAINS

I believe in squeezing out the maximum benefit from each workout session. Here are my 3 favorite training techniques to get the most from each and every exercise, in no particular order. These strategies will make your existing training routine more effective and diverse when it needs a boost.
 
Pre-exhaust training
 
Pre-exhaust training utilizes isolation movements to tire out a specific muscle group before moving on to a compound movement. For example, you could perform a chest fly before the bench press, or leg extensions before you squat. I usually carry out 100 tricep pushdowns and cable curls to warm up my arms and hit the muscles deeply.
 
 
The pre-exhaust method is one of my favorite training techniques for several reasons. First, by significantly fatiguing the isolated muscle group, it forces the fresh muscles to pick up the slack during the compound movement. The fatigued muscle gets pushed beyond what it would have been able to do without the pre-exhaust sets, and you don't have to sacrifice the full-body strength stimulus of, say, a bench press by trying to make it into a chest isolation exercise.
 
Supersets
 
A superset is two exercises performed back to back with no rest between the exercises. Supersets can increase your workout density, shorten your workout duration, spur new growth, and deliver an incredible pump. You can pair exercises for the same muscle group, like a triceps push-down and close-grip bench press, or pair movements for opposing muscle groups, like biceps curls and triceps push-downs.
 
I love to use this technique in conjunction with the pre-exhaust technique. As shown by the triceps push-down and close-grip bench press example above, I like to perform an isolation exercise to pre-exhaust a muscle and then immediately follow it with a compound move. This drives the target muscle past the point of failure and results in a killer pump.
 
Rest- Pause Training
 
Rest-pause training incorporates a brief rest period, or even a couple of rest periods, during a single set. This allows you to move a heavier weight for more reps than you could in a straight set. You allow your muscles to partially recover, but not completely, before you hammer them with another barrage of heavy reps.
For example, if you were to perform rest-pause on a set of triceps push-downs, you would first perform reps until you reach failure or a predetermined number of reps, and then you would rack or hold the weight, take an extremely brief rest period of 5-15 seconds, and rep to failure again. The brief rest allows you to extend your set and overload the working muscle.
Rest-pause sounds simple, and it is, but I would warn you to pay close attention to your form. Don't use such a heavy weight that you have to get sloppy to move it. While some people go crazy with rest-pauses and use them in multiple sets on a regular basis, I advise you limit them to a single set of each exercise you perform. Rest-pause is an overload technique, not a replacement for straight sets.
 
Incorporating these techniques into your training program will supercharge your muscle gains, building ip more muscle whilst giving you razor sharp definition.
 

Thursday, 3 July 2014

TYRE FLIPPING: PROS AND CONS

You 'Mirin?
 
 
There's no doubt about it: Tire flips are one of the coolest-looking exercises you can possibly do. Tire training is one of the best total body strength and conditioning workouts that a person can do. You use your total body when you flip the tire, and by varying the distance you flip the tire and time you flip the tire you can get a great aerobic workout. However, it is also one of the most dangerous moves you can concieve of if not performed properly.
 
 
When you flip the tire it is best to start with the tire flat on the ground. Place your fingers and hands as far under the tire as you can in this position and keep your hands about shoulder width apart. Squat down and then while pulling the tire up with your arms and back explode out of the bottom position. As the tire comes up you should have enough momentum that you can change your hands from a pulling to a pushing position and push the tire all the way over. Immediately after the tire is pushed over and flat start the process again.
Florida-based personal trainer Rob Simonelli agrees. "Tire flips are best used for folks who'll have to flip tires in some sort of strength competition," he said. Furthermore, hardly anyone has the hip mobility to do it right. Just about everyone, including Strongman competitors, goes into lumbar kyphosis -- a rounded lower back -- when they bend down to grip the tire.
World-famous, Boston-based strength coach Mike Boyle said, "Most people don't have bad backs. They've got bad hip mobility, which causes their bad back."
When it's used as a training exercise, the goal is to work the posterior-chain muscles, like the lower back and the hamstrings. That's something you can accomplish very well with deadlifts. According to some authors ,the only real benefit to doing tire flips is the fact they're often done outside, where other people can see you doing these stunningly badass exercises. But "because it's badass" isn't necessarily a good reason to do it.


Sunday, 22 June 2014

THE 10-MINUTE DUMBELL WORKOUT

If you're one of those people who find themselves stuck for time, especially in the mornings, then this is for you. Many people erroneously believe that if a program is not complicated, it will not work; however the converse is almost always the case. I have often found that simple workouts composed of basic exercises and compound movements are highly effective for building muscle when you have precious little time to spare.
 
This workout is designed to be executed using dumbells, but you can substitute a barbell in these movements.
 
1. Jumping Jacks:
 
 This is fun, easy and takes little extra space. Aim to carry out 100 jumping jacks in one minute. Try wearing wrist and ankle weights to increase the intensity of your jumping jack workout and workout your shoulders and quads at the same time.
 
Jumping Jacks / Star Jumps
 
2. Squats:
 
If you're using dumbells, perform goblet squats. Similar to a front squat, the goblet squat keeps you in an upright position because of the way the weight is positioned. This means you recruit your quads more than your posterior chain, likely causing you to lift less weight than you would in a back squat.  If you're using a barbell. perform back squats. Try to execute 20 reps in 2 minutes with perfect form. The speed of the workout will enhance the muscular benefits, whilst providing a cardio workout at the same time.
 
 
3. Shoulder Press:
 
 
To perform the shoulder press, start with the weight in your hands at about the same height as your ears. Move the weight directly over your head. Keep your abs tight and posture completely upright. Make sure the weights don’t float to the sides or out in front of your body. That will decrease control of the weight.  The exercise finishes with your arms straight and your biceps by your ears. Lower the weight down slowly and under control. Perform 20 reps in 2 minutes.
 
4. Bench Press:
 
 
This is a staple of the fitness regime, it develops your pectorals, anterior deltoids, trapezius and latissimus dorsi. Try to execute 30 reps with a manageable weight in 3 minutes.
 
5. Salute to the Sun
 
I've written an article on this yoga sequence which is highly effective in working the entire musculature. It is a wonderful way to cool down whilst keeping your muscles supple. Use this as a cap to your workout,


Tuesday, 17 June 2014

GET RIPPED LIKE FRANK MEDRANO

Frank Medrano is a legend in the fitness space. The sheer scale of muscle definition he sports beggars belief, but that pales into insignificance when compared to his ability to control his core and use it to perform exercises which most people are simply unable to to perform.
 
 
Frank builds his impressive body by blending high intensity weight training with calisthenics. He quickly cemented his reputation as the king of calisthenics through his YouTube videos. His videos are especially captivating as he continues to do things with his body that most would consider to be impossible. Through vigorous body weight exercises Medrano challenges his body to obtain the unthinkable.


Getting your body into the shape, strength and definition attained by Frank is a function of time and discipline. A beginner routine would look like this:

20 Diamond push ups
20 Regular push ups
20 Wide push ups
20  Eagle push ups
25 Pull ups
25 Tricep Dips
30 reps of Barbell curls with the heaviest weight you can manage with perfect form
30 reps bench press with the heaviest weight you can manage
50 reps of Bodyeight Squats

This workout will leave you sore for a few days, so make sure you take out a day to rest and feed your muscles. Try upscaling your workouts each week and observe how your body will change into a phenomenal machine in a few months.


Saturday, 14 June 2014

JOHN CENA: THE EVOLUTION OF A SUPERSTAR PHYSIQUE

No matter what you may think of him, arrogant self promoter, skilled entertainer, talented businessman. You cannot help but admire the staying power and star quality of John Cena, former WWE Heavyweight champion. He is one wresler who was able to remain in shape all year round; since his retirement from the WWE, Cena has shown a different side to his personality.
 
Cena shows that a bodybuilder can always get bigger, better and stronger if he's willing to put in the work and disclipines himself to follow good habits. There are no upper limits to your physical potential. At the start of his career, John Cena was a muscular guy. Notice in particular the more defined pectoral muscles, the relatively smaller shoulder blades and more defined ab muscles.. However, he was not quite as big as he has become. Cena certainly has done some incredible feats of strength in the ring, including a bodyslam on the Big Show.

It is worth noting that Cena has not fallen foul of the Wellness Program during his time in the WWE, despite claims that he used steroids to facilitate his muscle growth.
 
Hormones and steroids, when combined, give an illusion of health and physique, and yet as has been sadly shown, many wrestlers have paid the ultimate price in recent years. Steroids, when used excessively, cause the body to break down and pressure is placed on the heart and other organs. Those that see these drugs as mere stepping stones are kidding themselves that they are somehow healthy.


Wednesday, 11 June 2014

4 STEPS TO BOLDER SHOULDERS

The shoulder is made up of three smaller muscle groups, the anterior, medial, and posterior deltoid (named ofter the Greek term for triangle). However, most people focus on pressing exercises which target the anterior and medial heads of the deltoids, but not the posterior head. The result: rounded shoulders that appear smaller and interfere with your arms rotation, increasing your risk of injury.


Seated Barbell Military PressSeated Barbell Military Press
 
SEATED SHOULDER PRESS (Anterior and Medial deltoids, triceps, upper trapezius)
 
Sit on a bench and grab the bar with your hands slightly wider than shoulder width apart and your feet flat on the floor. Press the bar overhead, hold for 3 seconds and gently lower the bar to the front of your chest. Concentrate on lifting and lowering in a straight line and avoid leaning forward. To increase the intensity, slow down the lowering phase.
 
The behind the neck variation is not recommended for people with shoulder problems as it can be hard on the rotator cuff due to the hyperextension created by bringing the bar behind the neck.
 
STANDING MILITARY PRESS (Anterior and Medial Deltoids, Triceps)
 
Standing Military Press Standing Military Press
 
Using a squat rack and a weight you can lift for about eigth repetitions, hold the bar with an overhand grip, keeping your back straight and your face forward, slowly press the weight overhead until your arms are fully extended, elbows unlocked. Pause, lower the bar to your chest and repeat. Try keeping movements slow and deliberate to avoid injury.
 
 
HANDSTAND PUSHUPS (Medial deltoids and triceps)
 
Handstand Push-UpsHandstand Push-Ups
 
With your back to the wall bend at the waist and place both hands on the floor at shoulder width. Kick yourself up against the wall with your arms straight. Your body should be upside down with the arms and legs fully extended. Keep your whole body as straight as possible. Tip: If doing this for the first time, have a spotter help you. Also, make sure that you keep facing the wall with your head, rather than looking down. Slowly lower yourself to the ground as you inhale until your head almost touches the floor. Tip: It is of utmost importance that you come down slow in order to avoid head injury. Push yourself back up slowly as you exhale until your elbows are nearly locked. Repeat for the recommended amount of repetitions.

Caution: Ensure that the floor surface is not slippery and also, if performing for the first time, use a spotter until you get good at this exercise.
 
BENT OVER CABLE ROWS (Posterior Deltoids)
 
Bent Over Low-Pulley Side LateralBent Over Low-Pulley Side Lateral
 
Stand between the stacks of a cable station, cross your hands in front of you and bend down. Grab the left  low pulley handle with your right hand and the right one with your left hand. With your knees slightly bent and your back straight, bend forward until your back is almost parallel to the floor. Slowly raise your arms out to the your sides until they are parallel to the floor. Pause, then slowly lower your arms. Ensure that you keep your head and neck in line with your torso. Looking up can work the medial deltoids.


Monday, 9 June 2014

5 EXERCISES FOR A FULLER CHEST

Building a fantastic chest is not rocket science, as made out by some fitness publications and personal trainers. However, it requires a lot of discipline and proper use of some basic exercises. This Circuit is designed to blast your chest from different angles, leaving you with a fuller, stronger chest. The aim is to continue the circuit until you can go no further, so I wont prescribe that you do a particular number of sets.
 
Barbell Bench Press
 
This is a gym staple and  if I was paid a dollar for every bench press rep I see each day I go to the gym, I would be a millionaire by now ( and not only in Nigerian Naira!).
 
Work with wide and medium grips, and go for high reps, increasing the weight as you go until you reach the point where you can only deliver two reps (semi -exhaustion). I usually start out with 20 reps to warm up my muscles before I blitz my chest. The aim of the bench press should be to test your mental and physical mettle, not to showcase your ego, so chuck your ego at the door!!
 
 FLAT DUMBELL FLYE
 
 
The fly helps recruit a greater amount of muscle fibers across your chest than some pressing exercises and improves the "mind-muscle connection" in more novice lifters, allowing them to engage the chest muscles more in other exercises. you should emphasize going really deep on these, getting that stretch. Really feel that at the bottom of it and squeeze it all the way to the top. Try to touch the weight together gently but don't worry about clanking the weights together initially. perform each set to exhaustion.
 
PUSH UPS
 
 
This exercise is supposed to push blood into your pecs and build endurance in your triceps and shoulders, whilst giving your muscles some rest from the weight you've just lifted. Aim to hit 100 reps at least, building your endurance until you can successfully crank out 500 reps in the course of the entire circuit.
 
INCLINE DUMBELL PRESS
 
This exercise helps build your upper chest, giving you that 'shelf' that makes your pecs look impressive. Select a challenging weight and keep the same weight  throughout the circuit, but bring your muscles to failure during each set. Make sure that your elbows never drop past your shoulders as you perform each rep, and squeeze the pecs throughout.
 
BAR DIPS
 
This fairly underrated but highly effective exercise is a fantastic cap to your workout, as it isolates and totally decimates the muscles of your chest, while developing hard core muscle endurance. Bar dips also work on the rear and front deltoids.
 
 
Round off your workout with some stretches to expand your pecs and give you a more defined look.


Tuesday, 27 May 2014

CORE EXERCISES TO PREVENT BACK PAIN

Back pain is a problem for many people, and whether it is a chronic condition or an intense flare-up of an occasional problem, finding a remedy that relieves it and prevents it can sometimes be a challenge. Instead of treating yourself with pain medications that will only wear off, requiring you to medicate again, take advantage of some exercises that might help you with your back pain. In addition to making you feel better, physical activity and basic exercises can even prevent pain from returning. If the pain is intense or does not go away, make sure you consult your doctor or a chiropractor.
 
While the common suggestion is often to “rest” when you are experiencing back pain, a little activity might actually do more for your back than bed rest. You want to train your back to function properly again, and the best way to do something simple, like walking. You will want to avoid any strenuous activities or exercises that might have triggered the pain in the first place.
 
Be cognizant of your breathing and breathe air into the lowest point of your belly. You may not think how you breathe has an impact on your core, but it makes a big difference. Most people "shoulder breathe" by elevating their shoulders and lifting their rib cages to let air in. This is erroneous because the diaphragm can't do its job effectively. It also limits the function of the inner core—the muscles affected most powerfully by breath.Breathe this way when lifting, walking, sitting, reading, and talking.
 
Think about your posture too. The nerves around your spinal column can easily get pinched or compressed if you do not have good posture, creating additional pain on top of what you are already experiencing.  Walk with your back straight, your shoulders back and your head up. This will keep your back aligned and not hunched. This will protect your back and stomach muscles from deteriorating.

 
The core is a collection of muscles which stabilize and move the spine. Purposeful core action requires understanding its function. The core stabilizes and protects the spine by creating stiffness that limits excessive movement in any direction—most notably extension, flexion, lateral flexion, and rotation. In lifting terms, the core's responsibility is to limit movement. Core training should be in the moderate rep range for best growth. No more endless reps of crunches and sit-ups like you've done in the past. Focus on sets in the 8-15 rep range. Here are some exercises to help you build the muscles that comprise your core.
 
Dumbbell Side Bend Dumbbell Side Bend

Dumbbell Side Bend: 1 set of 30 seconds + 15 seconds rest

Exercise Ball Crunch Exercise Ball Crunch

Exercise Ball Crunch: 1 set of 30 seconds + 15 seconds rest

Flat Bench Leg Pull-In Flat Bench Leg Pull-In 
 
Flat Bench Leg Pull-In: 1 set of 30 seconds + 15 seconds rest